
A Better Zoomin
|
|
Home |
 |
Back To Tips Page |
|
|
A Better Zoomin |
|
This project came about as the result of a question in one of the newsgroups. Someone was asking about how to write a color-picker.
Far too many times, I've needed a color-picker. I've also needed to capture pieces of images on the screen to put into other programs, such as icons. The problem is that ZoomIn doesn't support most of what I need to do.
What's wrong with Zoomin?
The original questioner had posed some complicated ways of dealing with the problem, such as using timers and hook functions. These aren't necessary.
This project produces an image much like the one below.
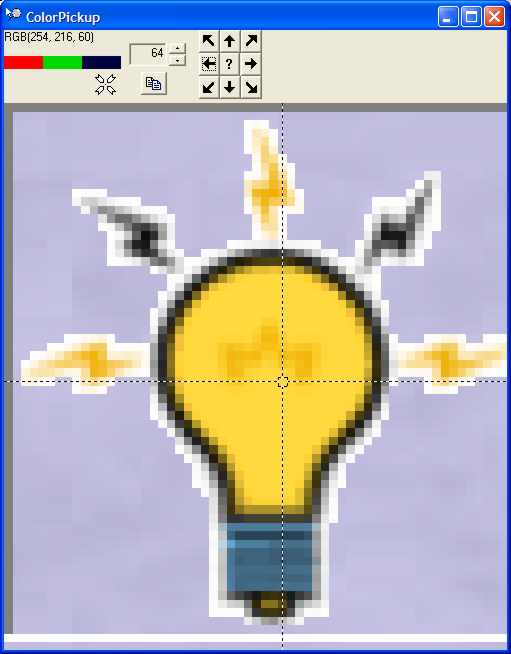 In order to create this, I set
the image size, controlled by the spin control at the top, to 64 pixels. I then
took the picker tool,
In order to create this, I set
the image size, controlled by the spin control at the top, to 64 pixels. I then
took the picker tool, While moving around, there is an RGB value displayed at the top right. In addition, the actual R, G and B colors are shown. This represents the actual point where the cursor is placed (although you probably can't see it, there is a little tiny white dot in the middle of the picker tool that represents the cursor hotspot position). The way this is seen on the expanded image is that the dotted square in the center is the hotspot, expanded. The lines extending from the edges are just to make it interesting to find.
The ? key in the middle will display a box around the area that is selected.
The copy icon button, ![]() , will
copy the contents of the selection to the clipboard.
, will
copy the contents of the selection to the clipboard.
However, there are additional features.
Once the image is captured, moving the mouse over it will put into the RGB display the actual pixel value for the pixel under the mouse
Clicking and dragging within the image area will select a sub-region. This will then be marked with a selection rectangle. Note that the old rectangle does not disappear until the new one is created. This is deliberate, so you can see the old selection while making a new, larger or smaller, selection.
This is shown in the figure below and to the left. Note that this image is smaller. I did that by resizing the dialog. In this example, there is a selection box around the base of the lamp.
What's interesting about this code?
Like most of my examples, this is intended to show some ideas about using
Windows and/or MFC. Ideas that are included in this code are:
There isn't much code here, but the code that is here illustrates several useful techniques

.
![]()
The views expressed in these essays are those of the author, and in no way represent, nor are they endorsed by, Microsoft.